Thursday, July 13, 2017

Cupcake Inspiraiton

Today I have a card I created for this week's Cupcake Inspiration Challenge.  Here's the yummy cupcake for inspiration.


And here's my card:


I just purchased My Favorite Things "You're the Sweetest" stamp and die set, so when I saw this Cupcake I had to try out the stamps and dies to create a cupcake. I think it turned out pretty well. The "straw" is part of the North Pole Sign from DRS Designs. I stamped it onto white CS, colored with Copics and fussy cut it out. Everything else was stamped and die cut. I added some glossy accents to the cherry. It really shines in real life. Baker's twine and sequins complete the look.

Thanks for stopping by,

shelia


Monday, July 10, 2017

butterflies

I hope you all had a great weekend and were able to get inky! I have two cards to share with you today. The first one features the new Life is Measured Greeting.


I started by cutting a partial ring out of the white panel using two nestie circles dies. The remaining pieces were glued onto a black card base, leaving the partial ring black. The butterflies were die cut from water color paper that was colored with various Distress Oxide inks. I used a paint brush to drop some small dots of water on the butterflies to remove part of the color, leaving white dots. The butterflies are added with strong glue on the left side only. The right sides of the butterflies are moveable. The new greeting was stamped with Versafine Onyx black ink in the center of the partial circle.


My second card uses the new brick wall image, which I stamped with Memento black ink and then colored with copics. After die cutting the circles, the white panel was added to the kraft base. The pussy willow image was stamped on the inside with Memento Rich Cocoa ink. A Pitt pen was used to color it in.  I found a small tag in my stash so I stamped the sending you hugs greeting on it with Versafine Onyx ink and then sponged the edges with Fired Brick distress ink. Some baker's twine and a bow complete the look.

Thanks for stopping by today.

blessings,
shelia

Friday, July 7, 2017

Challenges

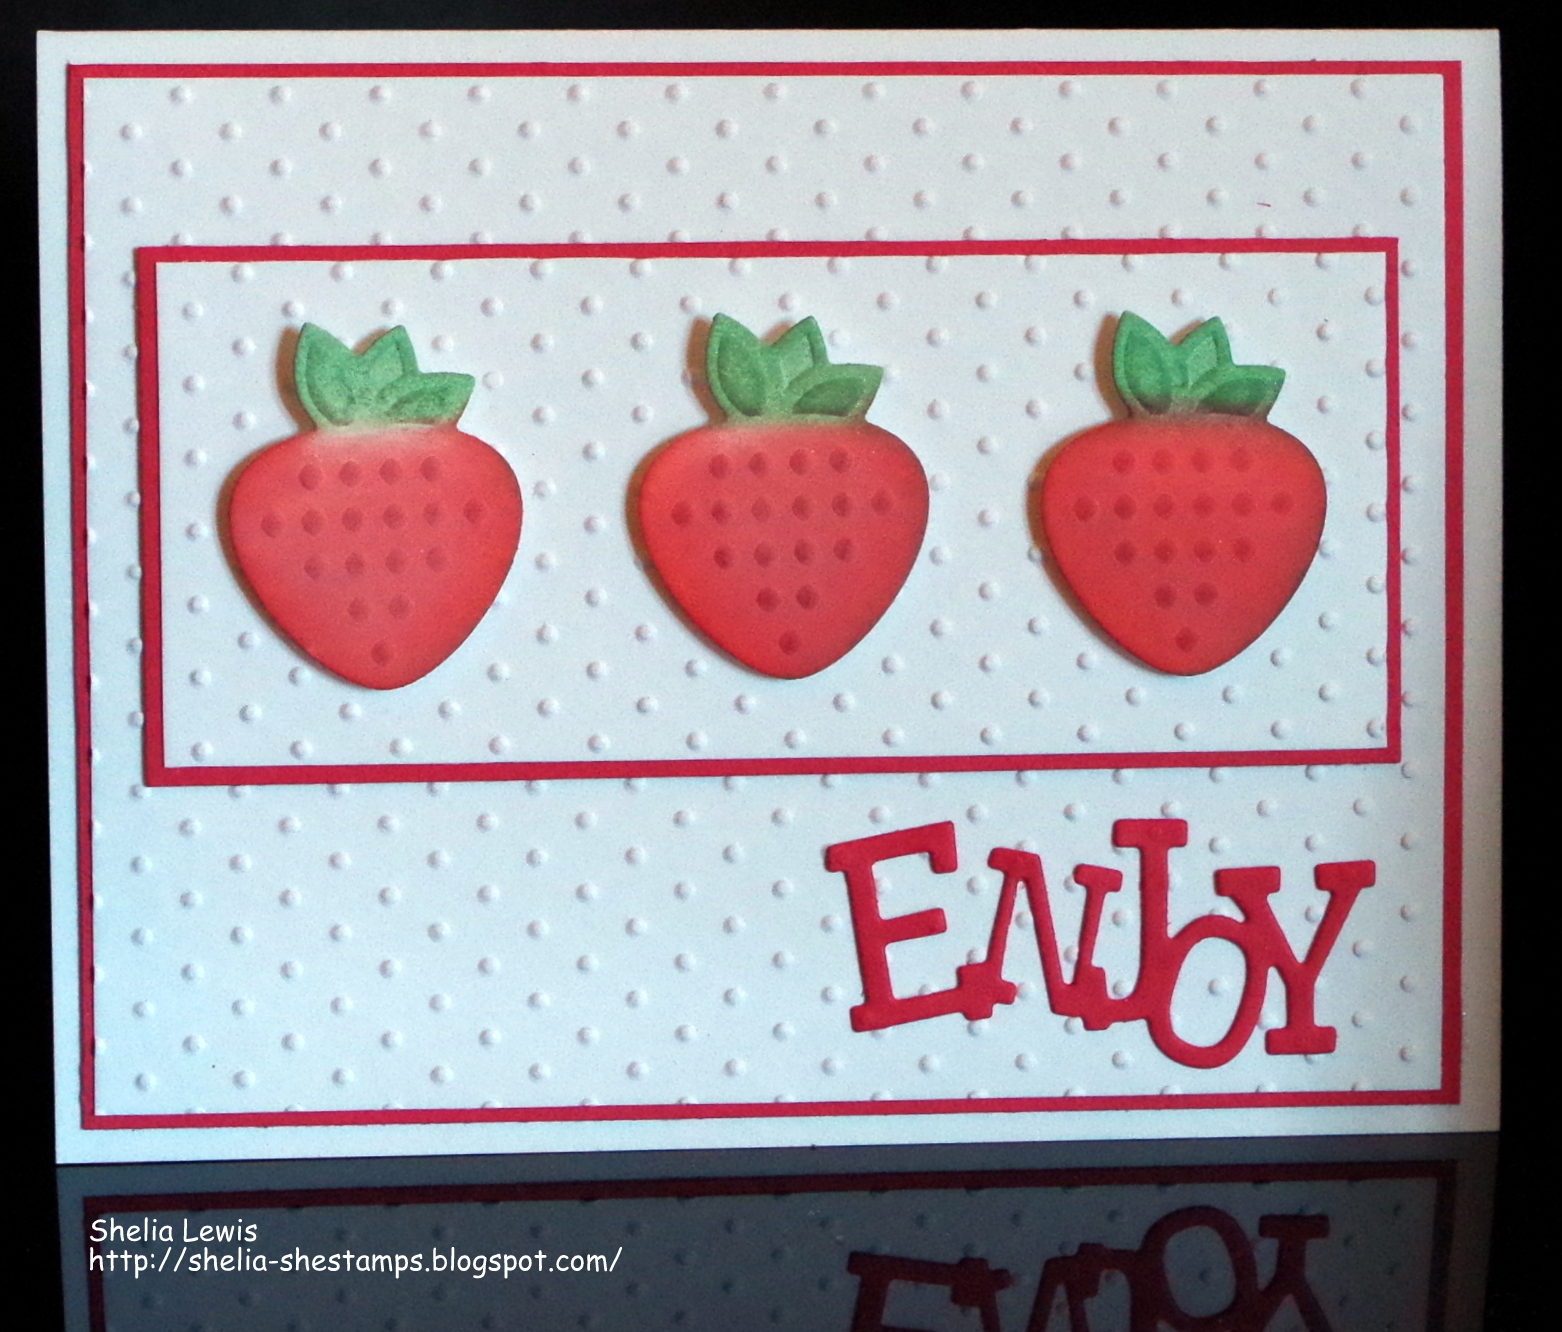
Here's a card I created for this week's sketch challenge at Tuesday Morning Sketches and Dies R Us Blog Challenge.   


Here's the sketch for TMS:  


The challenge at Dies are Us is to use layers.                                                                                                                                                              


I die cut the strawberries, colored them with distress inks, added them to the white CS after embossing it with the Swiss Dots folder and then layered it onto red CS and repeated the layers. Instead of stamping a greeting, I decided to die cut that too. All of the dies are from SB Maker's Mart Die of the month kits. The "enjoy" is from the June kit and the strawberries are from the May kit. I'm enjoying these monthly kits. They are great dies and not too expensive. It's a fun way to increase your stash of dies too.

Thanks for stopping by today.

blessings,
shelia

Monday, July 3, 2017

Tropical Paradise

Hi everyone,

DRS Designs is just about to release some new images that you are going to love! My card today features the new Silhouette Palm Trees (288P) and I just know this is going to be a favorite of mine.


I started by stamping the line of palm trees (288P) with Versafine Onyx black ink onto water color paper, embossed it with clear embossing powder and then sponged on various TH Distress Oxide inks for the sea and sky. Once the inks dried I stamped the Sand, snow, water lines with VersaMark ink and heat embossed it with detail white embossing powder. The little seal and dolphin were stamped with Memento Black ink onto white CS, colored with Copics and fussy cut. I used a craft knife to cut an opening along the top of the waves so I could tuck the dolphin and seal into the water. I really liked how this turned out and was so excited I just had to create another card with this new image.


This card uses the same inks for the sponged background. I started with a strip of paper, stamped the silhouette palm trees (228P) with Versafine Onyx black ink and heat embossed with clear embossing powder. Once the embossing cooled I sponged in the sky and sea and layered the strip onto black CS before attaching it to the larger panel which was also sponged with the same distress oxide inks. Once dried, I stamped the greeting with Versafine Onyx ink and then attached everything to a black card base.

Thanks for stopping by today. Be sure to head over to the DRS Designs on line store to check out the new images that will be released in just a couple of days!

Happy Stamping,
shelia

Monday, June 26, 2017

Follow Your Dreams


Hello Everyone! My card today features our new Follow Your Dreams sign post with some hot air balloons. I think this new sign post image is great for both retirement and grad cards. Don't you?

I started with white CS, sponged on TH Distress inks for the grass and sky, then I stamped the sign post and colored it with Copic markers. The balloons were also stamped on white CS, colored with Copics and fussy cut. The yellow and pink ones were glued onto the panel and the purple one is attached with foam adhesive for some dimension. I die cut a kraft colored frame using SB rectangle dies and then attached everything to a white card base.

Thanks for stopping by today!

blessings,
shelia

Monday, June 19, 2017

Retirement Wishes

Hi everyone. My card today reflects where I want to be when I retire. I love the beach. Early morning and late evening walks on the beach are two of my absolute favorite things. I'd love to retire on or close to a beach.


I started by creating the background with distress inks and sponges. Once the sand, sea and sky were the way I wanted I stamped the splatter background image onto the sand with distress ink for some more definition. The retirement greeting was stamped with Versafine Onyx ink, die cut and layered onto blue CS. The 4 in 1 seashells were stamped with Memento Black ink, colored with Copics, fussy cut and added to the greeting panel. Once glued on, I added some sparkle with a Sakura Gelly Roll pen. The clouds and sun were die cut, sponged with a dab of ink and added to the sky before everything was attached to the white card base. Now I want to go to the beach!!

Thanks for stopping by today.

blessings,
shelia

Monday, June 12, 2017

Retirement Time

Happy Monday Everyone. Hope you had a good weekend and were able to find some time to get creative. I've been playing around with TH Distress Oxide inks and thought I'd share a couple of cards with you.

On this first card, I started with some watercolor paper, the oxide inks and a TH clockwork stencil. I wanted to create retirement cards, so I thought the stencil with clocks would be perfect. So I taped the paper and stencil onto a craft mat and sponged the inks onto the watercolor paper, blending the inks together. I really like the chalky look of these oxide inks. The As you Retire greeting was stamped on to the same water color paper, die cut and layered onto a die cut label. Everything is attached to a black card base.


The second card uses the same water color paper, oxide inks and stencil, only this time I sponged and blended the inks onto the water color paper, sprayed the back of the stencil with water and carefully laid it onto the paper. I used a paper towel to wipe up the excess water. After just a few minutes the inks react with the water and the stencil image appears. I really like the look this technique creates.


The God Bless your Retirement greeting was stamped onto white CS with Versafine Onyx ink, die cut and layered on a black oval. A punched strip was added to the center, along with gingham ribbon before attaching everything to the white card base. A blue button and bakers twine complete the look.

Thanks for stopping by today!

blessings,
shelia