Monday, December 31, 2018

Happy New Years Eve


My first card today could be a Happy New Year card, but it is actually a birthday card for my sister in law whose birthday is New Years Day! I started with some white CS, stamped the starry background with gold ink, heat embossed it with gold EP and then cut it into 2 panels. Next I die cut the celebrate greeting using a SB small die of the month set. It is glued to the bottom panel and then I added some ribbon and gold glitter tape. The top starry panel is glued to the card base. The bottom panel is attached with some foam adhesive.  I think my sister in law will like this festive birthday card.

This next card uses the same background stamp only stamped and embossed in silver. I also stamped and embossed the Happy New Year greeting. Added a silver layer and frame and it's done!


Hope you have a fun New Year.

shelia

Monday, December 24, 2018

Merry Christmas Eve


 Merry Christmas Eve!! I hope you have a wonderful Christmas!  I have a couple of things to share with you today. First are some ornaments I created for gifts for friends at church. I found these ornament frames at Hobby Lobby and thought they'd work perfectly. I die cut some circles, sponged on the sky and ground areas and then added some Sakura Gelly Roll silver dots for stars. The nativity is die cut using an IO set. The Merry Christmas greeting was stamped with Versafine Onyx ink. I really like how these turned out. 

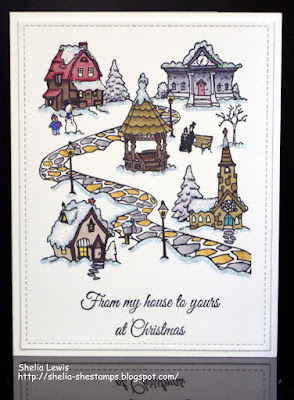
Next is a card featuring the new All in 1 Christmas Village. It was stamped with Memento Black ink, colored with Copics, die cut and then some Nuvo Blizzard drops were added for the snowy roofs, etc.
The greeting was also stamped with Versafine Onyx ink.


Inside I stamped the greeting and a single house which I colored  with Copics.


Have a blessed Christmas!

shelia

Monday, December 17, 2018

Seas and Greetings


Happy Monday! Can you believe Christmas is only a week away!! It has really snuck up on me this year. It's a good thing DRS Designs has some cool new Christmas images. They have really helped me get my last minute Christmas cards completed.

Today's card features the new Seashell Christmas Tree and matching greeting. The tree looks so pretty and is super easy to use. I stamped it with Memento Black ink onto white CS, colored the shells with Copic markers and then die cut the panel and layered it on some matching CS. The greeting was stamped, die cut and layered as well. The background was created for a Technique challenge on Splitcoast Stampers a couple of weeks ago. I used crumpled up saran wrap, dipped in various TH Distress Oxide inks and stamped it onto the white panel. It created a very soft and delicate looking background, which I love!

This next card uses the same two images, but this time I stamped them onto cream CS with Gold ink, heat embossed with Gold EP and colored in the shells with some TH Distress inks. I got the idea to stamp the image and greeting with gold from fellow designer, Julie.  You can see her gorgeous card, Here.


I die cut some shells from CS and added one to the greeting. The rest are inside the card. Don't know why I didn't take a picture of the inside to share with you. Oh well, the card is in the mail on its way to my cousin who absolutely loves the beach. I know she will appreciate this card.

Thanks for stopping by today!

shelia

Monday, December 10, 2018

masculine Christmas


Happy Monday! Hope you had a great weekend and were able to get inky. I'm having such a fun time stamping with the newest images from DRS Designs. I especially had fun creating this card for today's post.

I started with a piece of red CS and used the medium size part of the woven plaid stamp to create my buffalo plaid background. My Misti helped me line it up and keep it straight. Not sure I could do this without the Misti!

Next I stamped, colored and fussy cut the new Tool Christmas Stocking. The new matching greeting was stamped onto white CS, die cut and layered onto black CS. The tool border was stamped onto red CS and layered onto the same black CS. The little die cut tools were created using a TE die set. I added some white blizzard Nuvo drops to the white part of the stocking for some dimension.

Here's a look at the inside. I stamped the same tool border with red ink along the base of the inside.


Thanks for stopping by today. Be sure to check out the new images at DRS Designs on line store.

shelia

Tuesday, December 4, 2018

Fixin' to have a Merry Christmas!


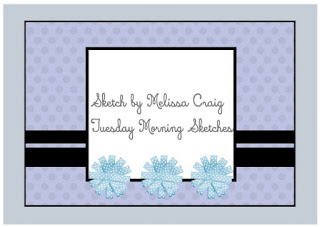
Today's card is one I created using this week's sketch at Tuesday Morning Sketches. Sketch Challenges are my favorite!  Here's the sketch. I turned the sketch sideways in order to make all my elements fit.


To begin I stamped the medium woven plaid piece onto green CS with black ink to make my buffalo plaid square. Next I stamped the Tool Christmas Stocking onto white CS, as well as some CS that I had covered with red ink. I fussy cut both, colored the tools with Copics and glued to two together. The greeting was stamped onto a white rectangle and the edges sponged with the same red ink as the stocking. The tools were die cut with a Taylored Expressions die set and added to the plaid panel with some tiny black brads. I haven't used brads in forever! The white panel was embossed with a Darice stars folder, layered onto green CS and then onto the white card base. Black CS and green glitter tape were used to create the two strips behind the main panel.

Thanks for stopping by.

blessings,
shelia


Monday, December 3, 2018

Reason for the Season


Happy Monday Everyone! Hope you had a great weekend. DRS has some new images for you and they are just in time for Christmas. My card today features the new Way, Truth and Life greeting.

I started by stamping the snow globe onto white CS, colored the wooden base with Copics, masked it off and used Distress Oxide inks for the ground and sky. The nativity is an IO die set. I used a Sakura Gelly Roll pen to add some silver stars in the sky. The new greeting was stamped with Versafine Black ink onto the white panel. I then added some silver washi tape. I used the same tape for the ribbon, bow and star on the snow globe.


Inside I stamped the Blessed Christmas greeting as well as the small nativity image.

Be sure to check the on line store here to see all the new images. You'll see lots of fun ways to use the new images here on the blog too.

Thanks for stopping by today.

blessings,
shelia

Sunday, December 2, 2018

Christmas Challenges!


Hi Everyone. I have a card to today I created for a couple of challenges: Tuesday Morning Sketches & Cupcake Inspirations.

I started with some water color paper, stamped the 4 in 1 snow with VersaMark ink, heat embossed with white EP & then sponged on some TH Distress Oxide inks for my sky. I die cut the snow banks, trees & deer, yhen added them to my little scene. I used a white gel pen to add the dots on the backs of the deer.. after layering the panel on some blue CS, I attached it to the white card base. The greeting was stamped, die cut & added to the top of the scene.

Here's the sketch from TMS:


And here's the cupcake from CI:


Thanks for stopping by.

blessings,
shelia

Saturday, November 3, 2018

Christmas Wreath


Hi everyone,

My card today is for this week's sketch at Tuesday Morning Sketches as well as the Inspiration Challenge at Splitcoast Stampers. I have been really negligent with my Christmas cards this year. Usually I have quite a stash by now, but not this year. The Inspiration Site at Splitcoast Stampers had some great ideas. I'm hoping this will be what it takes to get me in the groove to make some Christmas cards!!

Here's the sketch at TMS:


I die cut my wreath, leaves and berries, glued them onto the embossed white panel. The greeting was embossed with white EP and cut into a strip. To finish it off, I added some Nuvo Glitter Red drops to the holly berries.

I like the way this turned out. Thanks for stopping by.

blessings,
shelia

Monday, October 29, 2018

the pumpkin patech


Happy Monday! Hope you had a great weekend! It's cold and rainy here in NW Ohio, so staying indoors and stamping was definitely the way to go!  My card today was created for the Inspiration Challenge at Splitcoast Stampers. You can see details here.

I started with some watercolor paper and sponged on the sky and grassy areas using TH Distress Oxide inks. While that dried I stamped the new Pumpkin Pile, Pumpkin Patch and Flower Wheel Barrow onto white CS with Memento Black ink, colored them with Copics and fussy cut them. I also stamped the pumpkins from the 4 in 1 Harvest stamp as well as the smaller pumpkin from the Pumpkin Pile, colored them with Copics and fussy cut. The wheel barrow had flowers in it, so I just cut them off and then glued the pumpkins onto it from the back.

Before attaching everything to the watercolor panel, I stamped the easy grass background with Archival Black ink. Once the two pumpkin images were glued on, I added the black frame and then added the wheel barrow of pumpkins with some foam dots.

Thanks for stopping by today. Be sure to check out all the new images at DRS Designs on line store.

blessings,
shelia

Monday, October 15, 2018

Happy Halloween

Happy Monday everyone. Hope you had a great weekend! It has finally turned cooler and feels like fall here. I'm loving it!

I have a couple of Halloween cards to share with you today. The first one features the new Halloween greetings sentiment.


I started by stamping the goblin, hand and RIP Tombstone images onto purple, orange and green CS with Versafine black onyx ink, die cutting and layering them onto black CS. The purple layer was stamped with the accent bat image using the same black ink. The greeting was stamped onto orange CS and a strip of punched spider webs was attached at the seam of the two panels.


This second card was super easy. I started with a black card base, added the orange layer which is from a Recollections Lasercut Paper Pad I bought on clearance last year. The new Drink Up greeting and Witch's feet image were stamped onto white CS with Memento Black ink, colored with Copics, die cut and layered onto black CS.

Thanks for stopping by today.

shelia

Friday, October 12, 2018

Count Your Blessings


My card today uses this week's sketch from Tuesday Morning Sketches. My image is a bit big for the actual sketch since I didn't go with a square card, but I think I made it work.  Here's the sketch:


I started with some water color paper, stamped the image with Archival Black ink and then colored it with some Nuvo Watercolor pens. Once it dried, I die cut and layered it onto the purple die cut. The greeting was stamped with Versafine Black Onyx ink, die cut with a banner die and layered on the same purple CS. The white panel was embossed with a CB Pumpkin Swirl folder. I like the way this turned out. This pumpkin image is one of my favorites from DRS Designs.

Thanks for stopping by today.

blessings,
shelia


Monday, October 8, 2018

Halloween Greetings

Happy Monday Everyone. Hope you had a great weekend! I have a bridge fold card to share with you today. I've seen these cards in the past and decided it was time to give it a try. And it's pretty simple to do.

The card base is 8 x 4 1/4, scored at 1 1/4, 2 1/2, 5 1/2 and 6 3/4. The front strip is supposed to be 1 by 5 1/2, but I made my taller since I wanted the iron fence to be stamped on it. Anyway, here's my card:


I used black for the card base and added the orange panels after stamping them with the accent bats and the spooky eyes background with Versafine Black onyx ink. The iron fence and Halloween Greeting were both stamped with VersaMark ink onto black CS and embossed with white EP. I cut the greeting down and glued it to the top of the middle panel. The fence was layered onto orange CS and attached to the two folded edges to form the bridge. The little ghosts were die cut from vellum and the cat from black CS. These are both from the Spellbinders Small Die of the Month set for September.  There is space on the back of the middle panel to write your message. I decided to make bridge cards for my grandkids for Halloween this year. I think they'll like them and they fold to a standard A2 card, so mailing them is no problem.

Thanks for stopping by today. Have a great week!

blessings,
shelia

Sunday, October 7, 2018

Get Well Soon

Hi Everyone. My card today is for a friend who broke her shoulder recently. I used the sketch from  this week's challenge at Tuesday Morning Sketches.  Here's the sketch:


And here's my card:


I started by stamping the little images from MFT Get Well Soon set with Memento Black ink onto white CS, coloring them with Copics and die cutting them with the matching dies. The square white panel has the get well greeting stamped over and over with SU Barely Banana ink. I used some square dies to cut it and the black layer. The large white layer was embossed with the CB Swiss dots folder. The greeting was stamped with black ink, die cut and layered on the same black CS. The little images were added with foam squares for dimension. I couldn't get the yellow to show up very well in any of the pics I took. Oh well, it does look better in real like. Anyway, I'm certain my friend will like it.

Thanks for stopping by.

blessings,
shelia

Wednesday, September 26, 2018

give Thanks

Hi. Today my card uses the sketch from this week's Tuesday Morning Sketch Challenge. You can see the challenge here. Below is the sketch.


Here's my card:


I started with the filigree pumpkin from DRS Designs. It was stamped with VersaMark ink and heat embossed with copper EP and layered on some copper colored CS. The greeting, also from DRS Designs, was also stamped and embossed with the same EP. The leaves were die cut with a SB die set and glued onto the card. The pumpkin piece was attached with foam adhesive for some dimension.

Thanks for stopping by today. 

Shelia


Monday, September 24, 2018

Trick or Treat


Happy Monday! Trust you had a good weekend and found some time to get inky! I've been having fun playing with the new images and greetings just released by DRS Designs. For today's card I created a little scene using the new iron fence (771P), Trick or Treat greeting, Spooky Tree and  Ghost Family images. I stamped the tree and ghosts first, colored with Copics, sponged on the grass and sky areas and then stamped the greeting and fence with Versafine Black ink and heat embossed. I smudged a bit of ink behind the fence, so I added those pumpkins to cover it up. :-)

On the inside I stamped the rest of the Trick or Treat greeting and added some candy corn.


Be sure to check out the on line store to see these images and more from DRS Designs.

Thanks for stopping by today.

shelia